Table of Contents
The Open PS2 Loader (OPL) application reads PS2 game backups from a USB storage device (USB key, external hard drive), a network shared folder (through the SMB protocol), or the console’s internal hard drive.
In this article, we’ll look at how to install and configure OPL on a PlayStation 2, as well as how to play a PS2 game in ISO format (from a USB key or a network shared folder) or HDLoader format (from an internal hard drive).
Prerequisites
- A PlayStation 2 Slim or Fat
- A USB flash drive
- A hard drive with FreeHDBoot or a PS2 memory card with FreeMCBoot:
(Install FreeMCBoot/FreeHDBoot on PS2 Fat)
(Install FreeMCBoot on a PS2 Slim)
How to Setup and Configuration OPL (Open PS2 Loader)
OPL Installation
Open PS2 Loader (OPL) can be installed anywhere: on a PS2 memory card (not advised to avoid wasting storage for backups), a USB key (recommended for FreeMCBoot), or the console’s internal hard drive (recommended for FreeHDBoot). Simply copy the OPL.ELF file to one of these media and you’re ready to go.
Once installed, we will add OPL to the FreeMCBoot/FreeHDBoot menu to make it easier to launch.
Here’s how it’s done:
- Format the USB drive with the FAT32 file system (if not already done).https://github.com/ps2homebrew/Open-PS2-Loader/releases/download/v1.1.0/OPNPS2LD-v1.1.0.7z
- Download the Open PS2 Loader (English) (modified version with PS1 game support) or Open PS2 Loader (French) and unzip the 7z archive with 7-Zip.

- Copy the file OPNPS2LD.ELF (rename it as such) to the USB drive root directory.
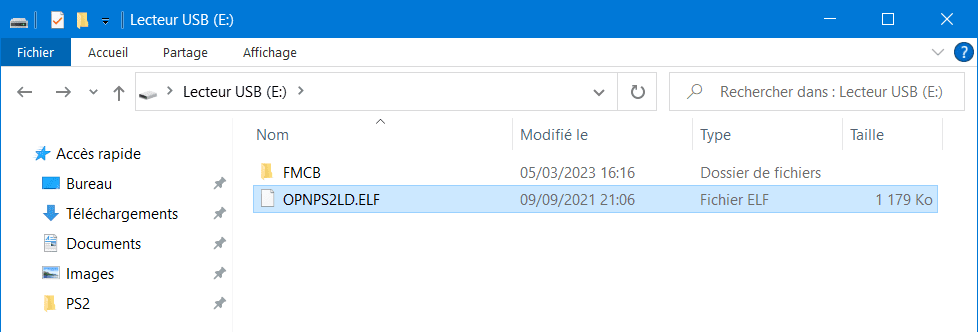
- Insert the USB drive into a USB port on the PS2.
- Turn on the PS2 with FMCB memory card or FHDB hard disk.
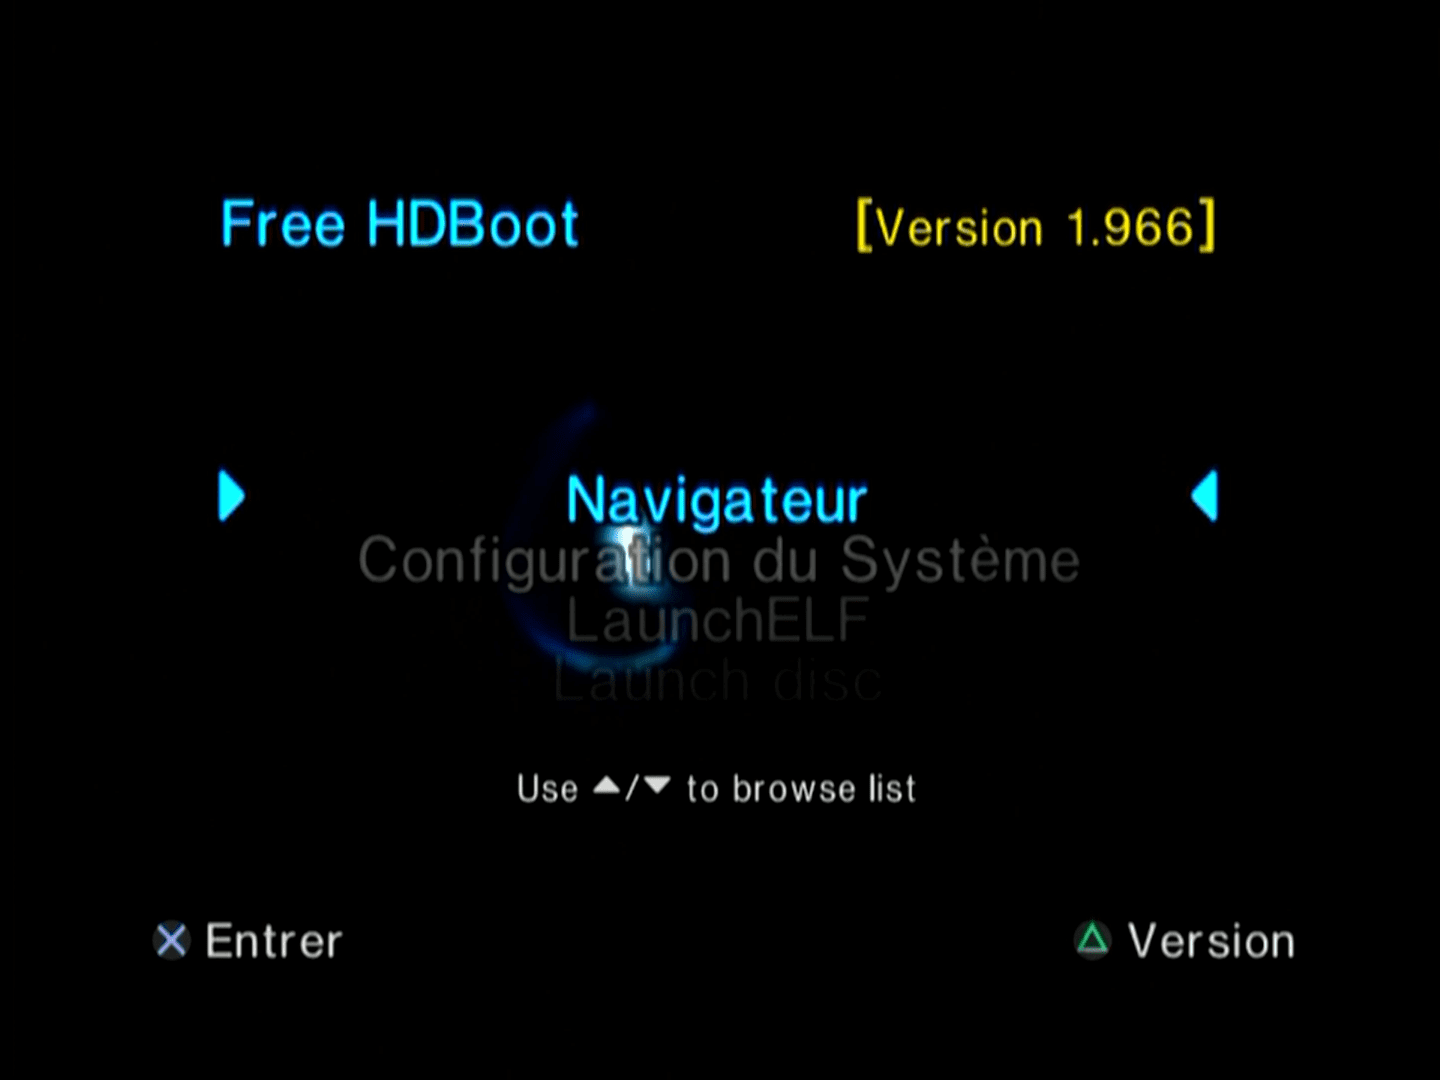
- Install Open PS2 Loader on the hard disk if you use FreeHDBoot:
- Start LauncherELF.
- Select File Browser→ mass:/
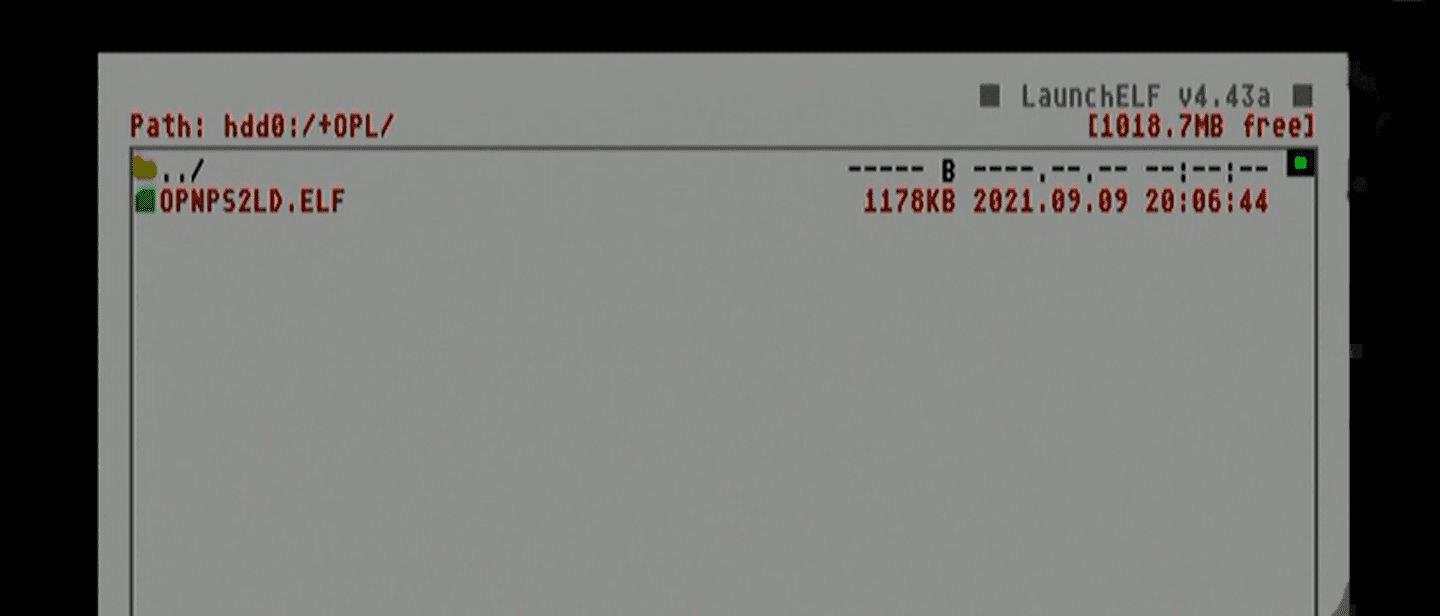
- Make a copy of the file OPNPS2LD.ELF (press R1 to Copy).
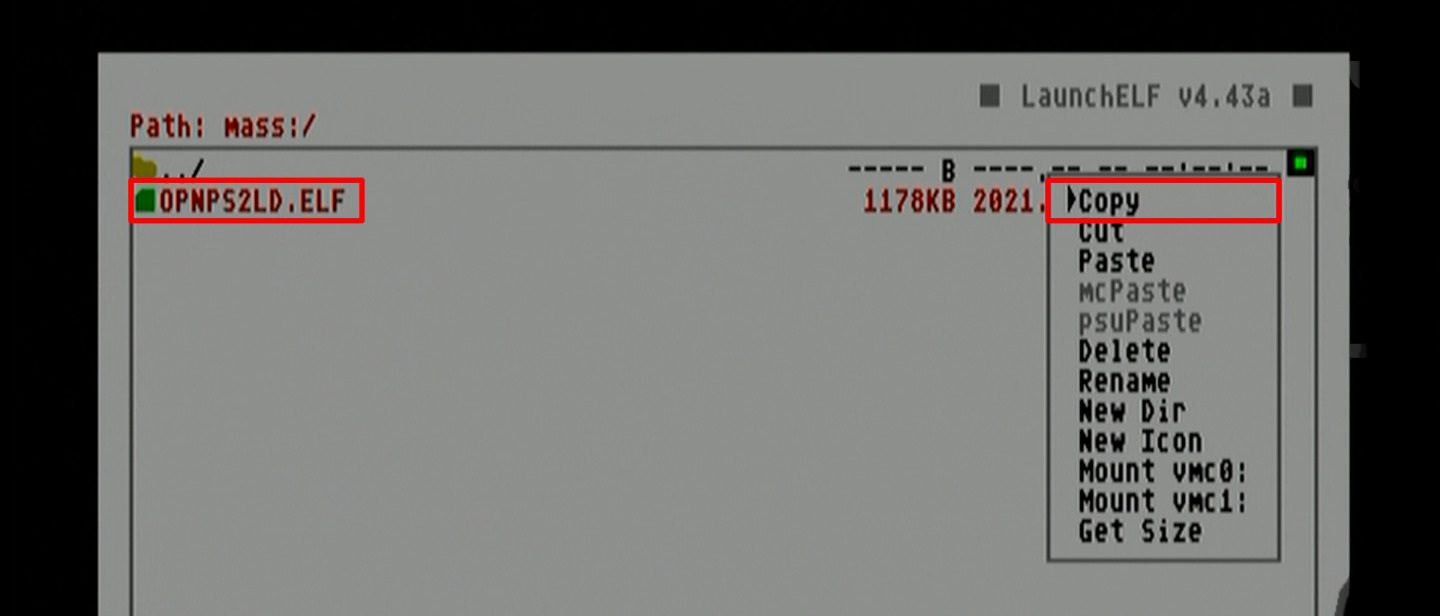
- Paste the file (Press R1 to Paste) in the hdd0:/ +OPL partition.
- Restart your PlayStation 2.
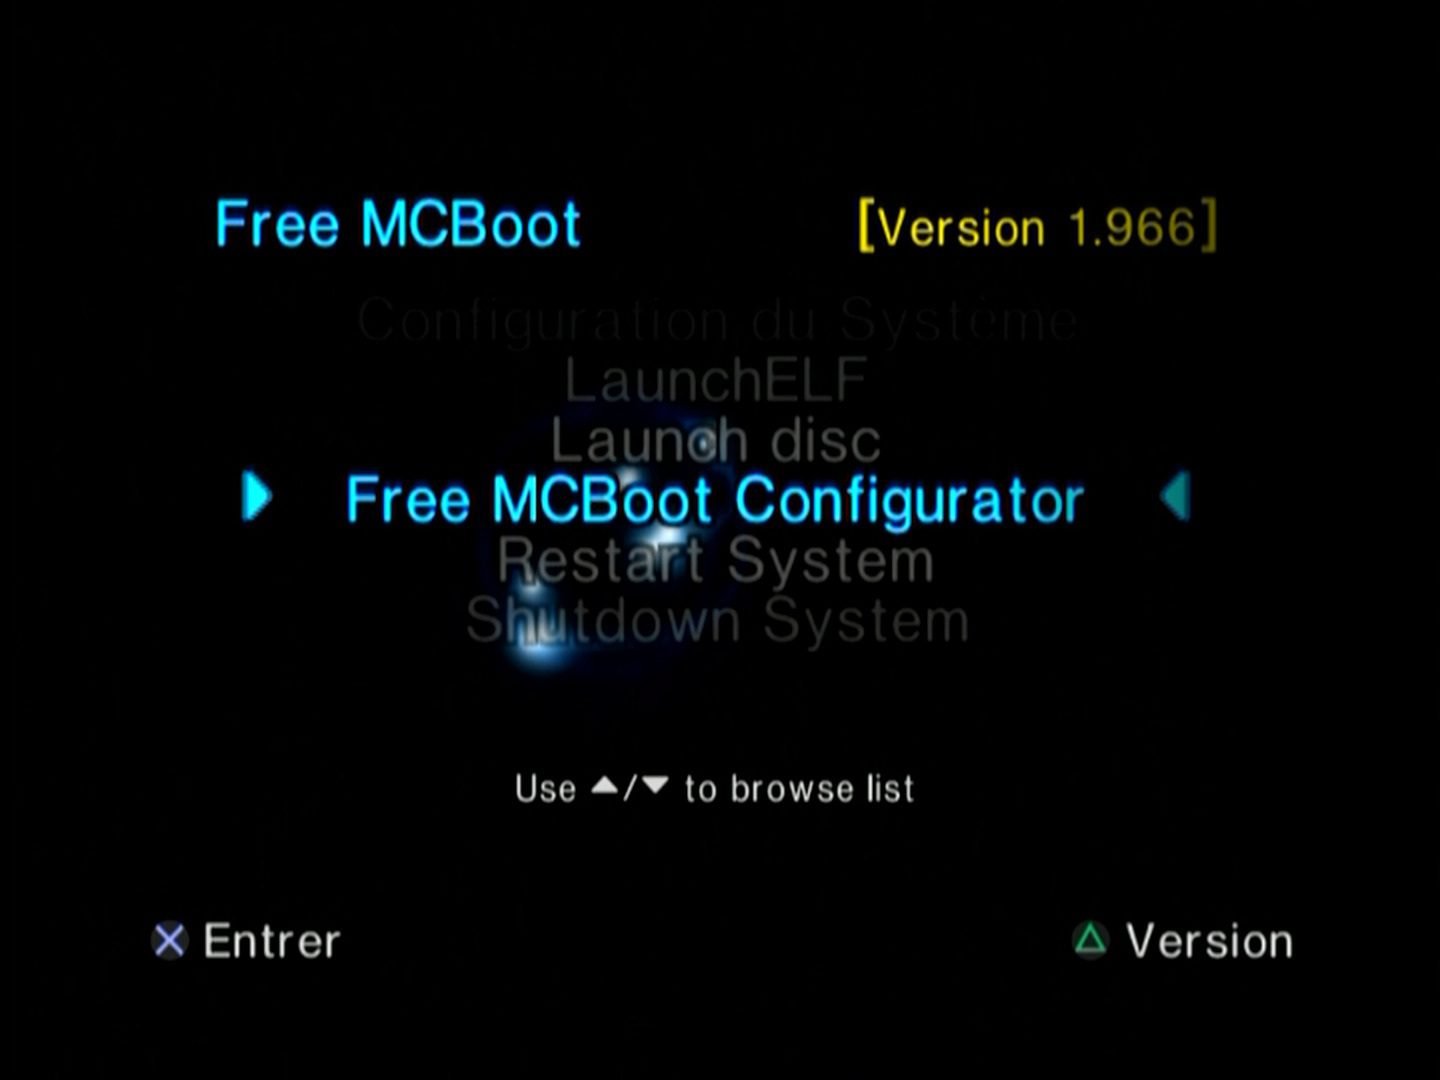
- Run the FreeMCBoot/FreeHDBoot Configurator program.
-
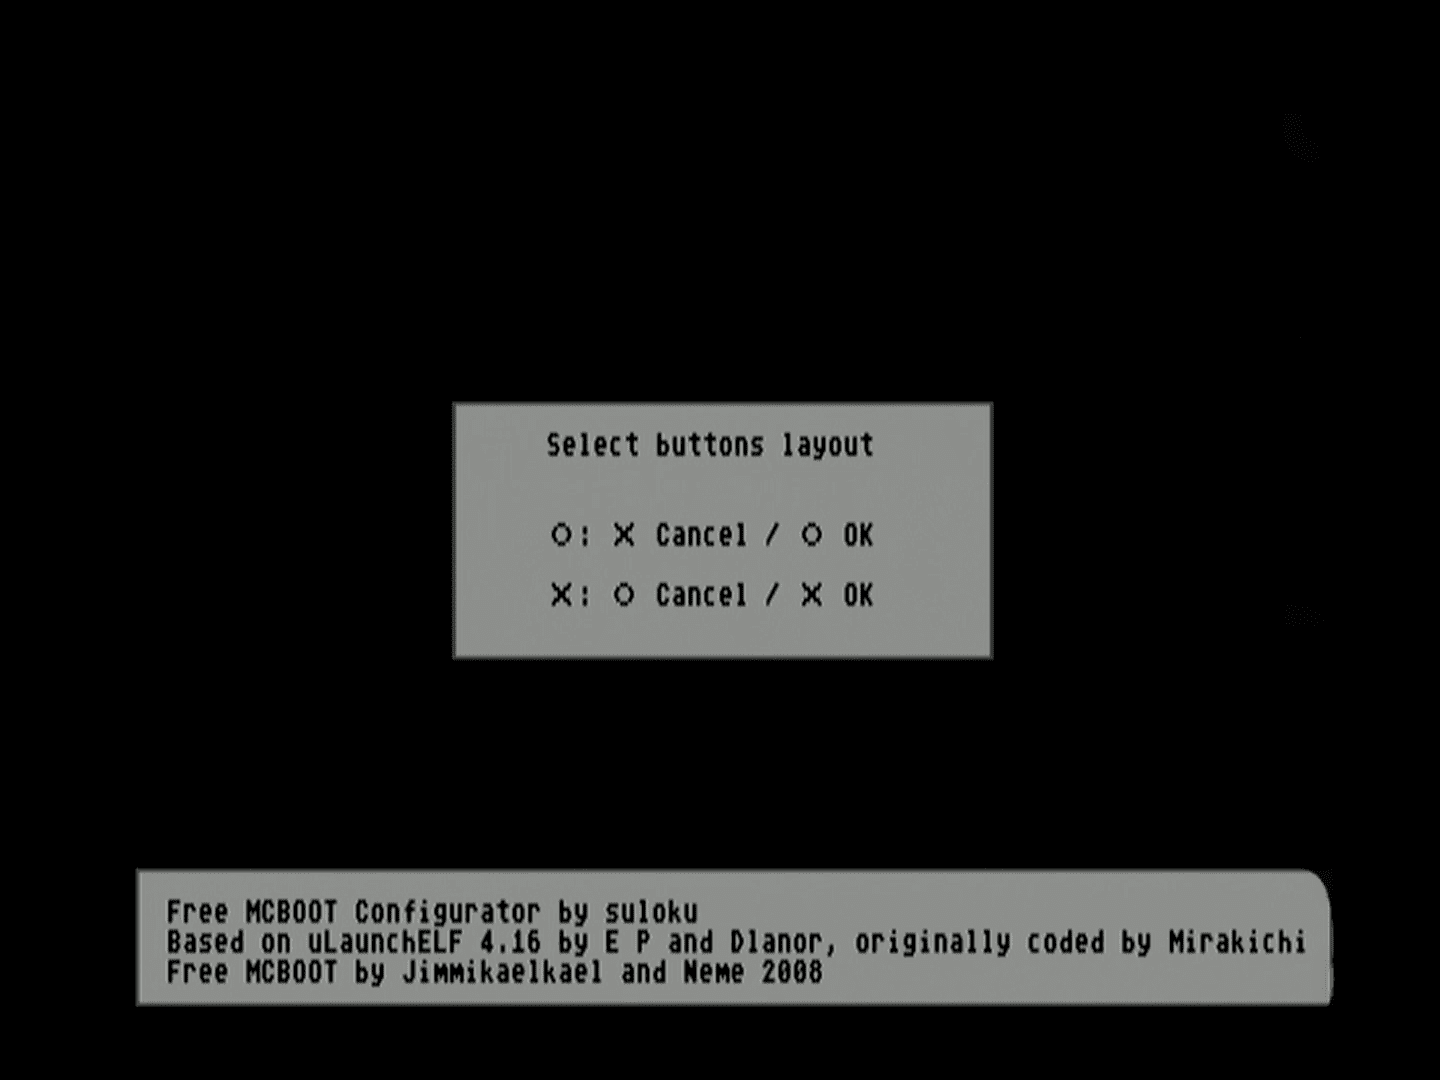
Select the controller button you wish to use to validate between X and O.
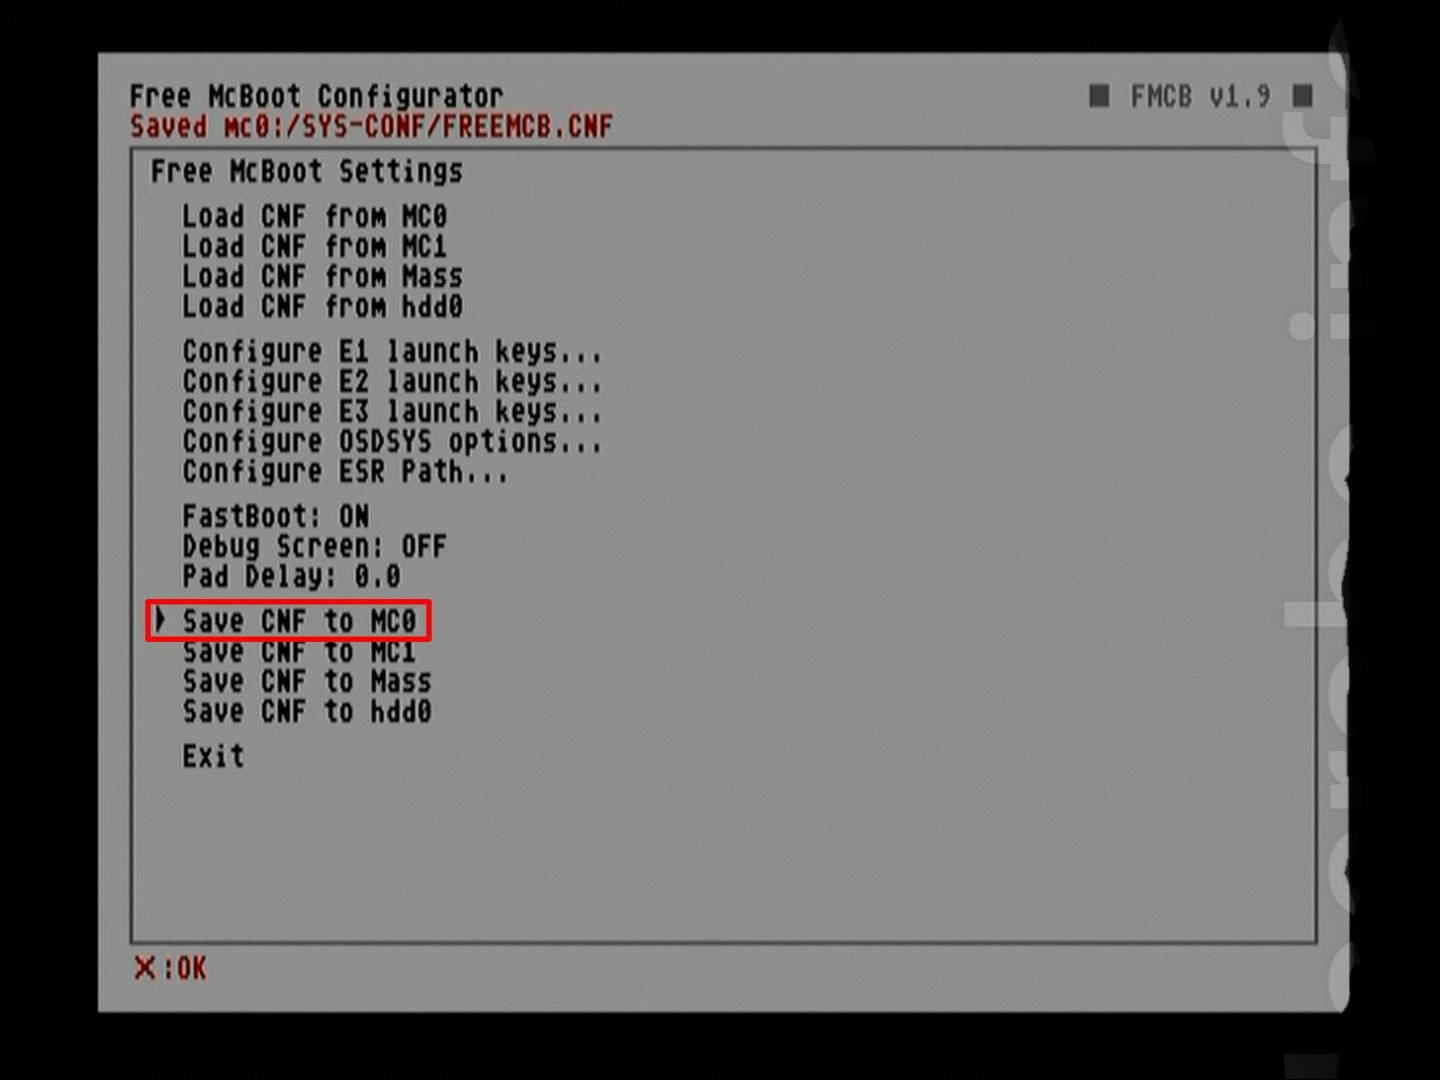
- Click on Configure OSDSYS Options.

- In Configure Item, choose item 6 (which is normally empty)

- Set up the input as follows:
- Name: Enter “Open PS2 Loader” into the search box.
- Path1: Locate the OPNPS2LD.ELF file in mass:/ (FMCB) or hdd0:/ +OPL (FHDB).

- Press Return twice to return to the FreeMCBoot Configurator main menu.
- Select Save CNF to MC0 To save changes.
- Click Exit to return to the FMCB main screen.
- The Open PS2 Loader (OPL) has been installed and is now accessible via the FMCB/FHDB menu!
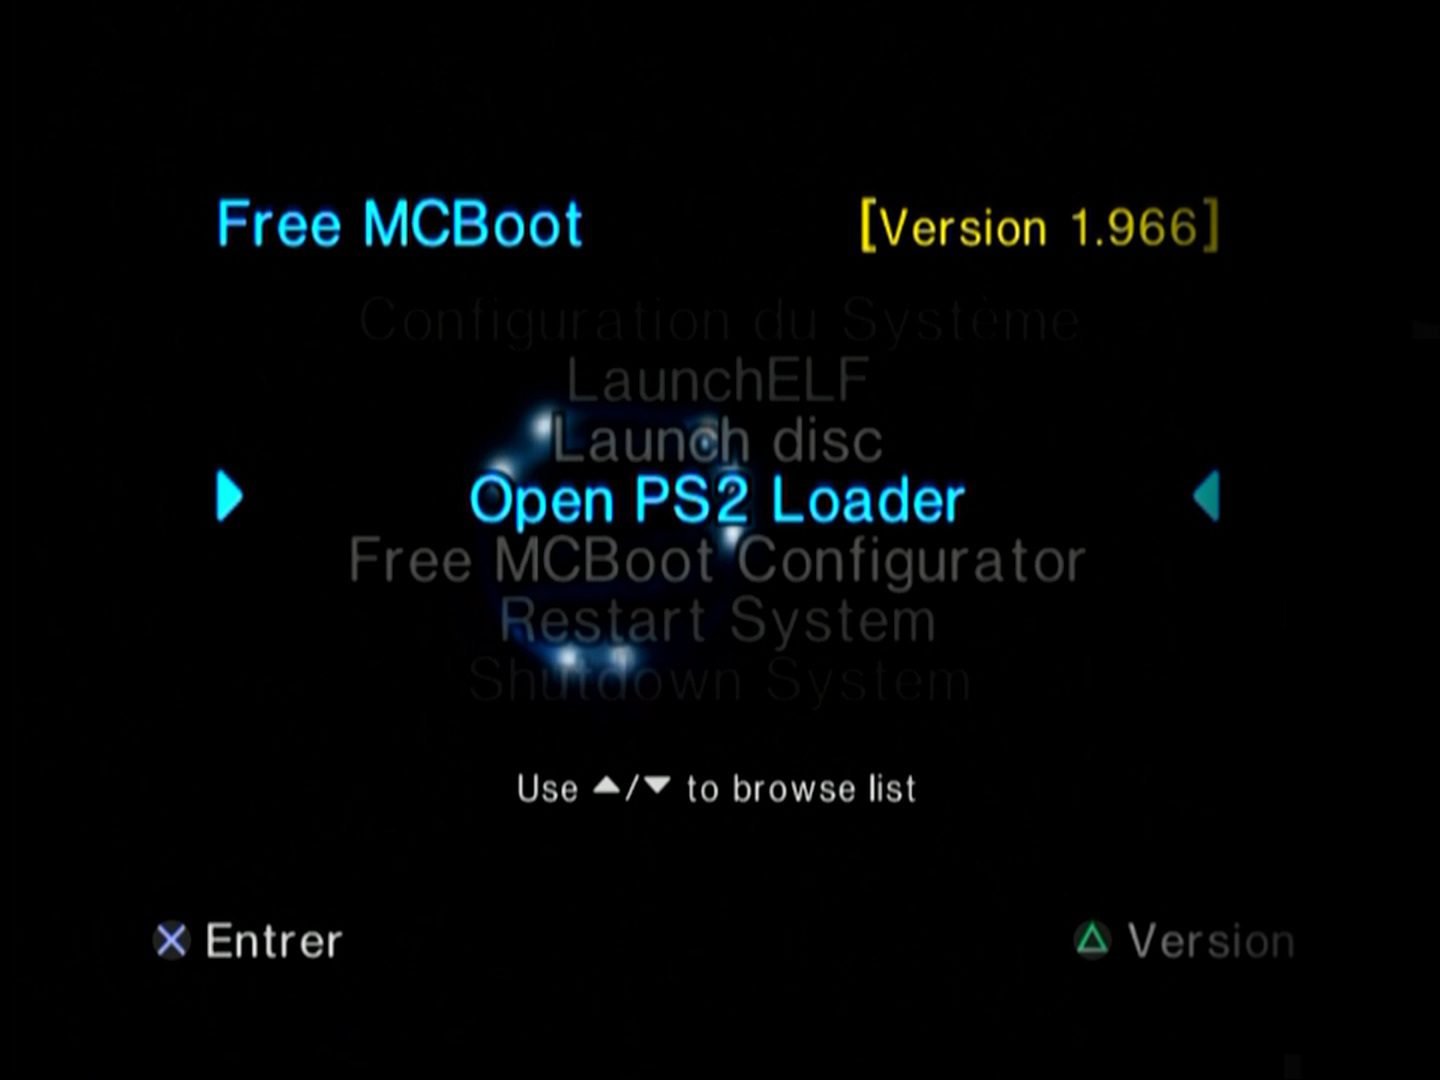
Step 1 completed: Open PS2 Loader has been successfully installed on the USB flash drive or PS2 hard drive
OPL configuration
Now that Open PS2 Loader has installed, it must be properly configured in order to launch PS2 games from a USB key, a network shared folder, or the console’s internal hard drive.
Here’s how it’s done:
- From the main FMCB panel, launch Open PS2 Loader.
- You’ve arrived at the OPL menu.

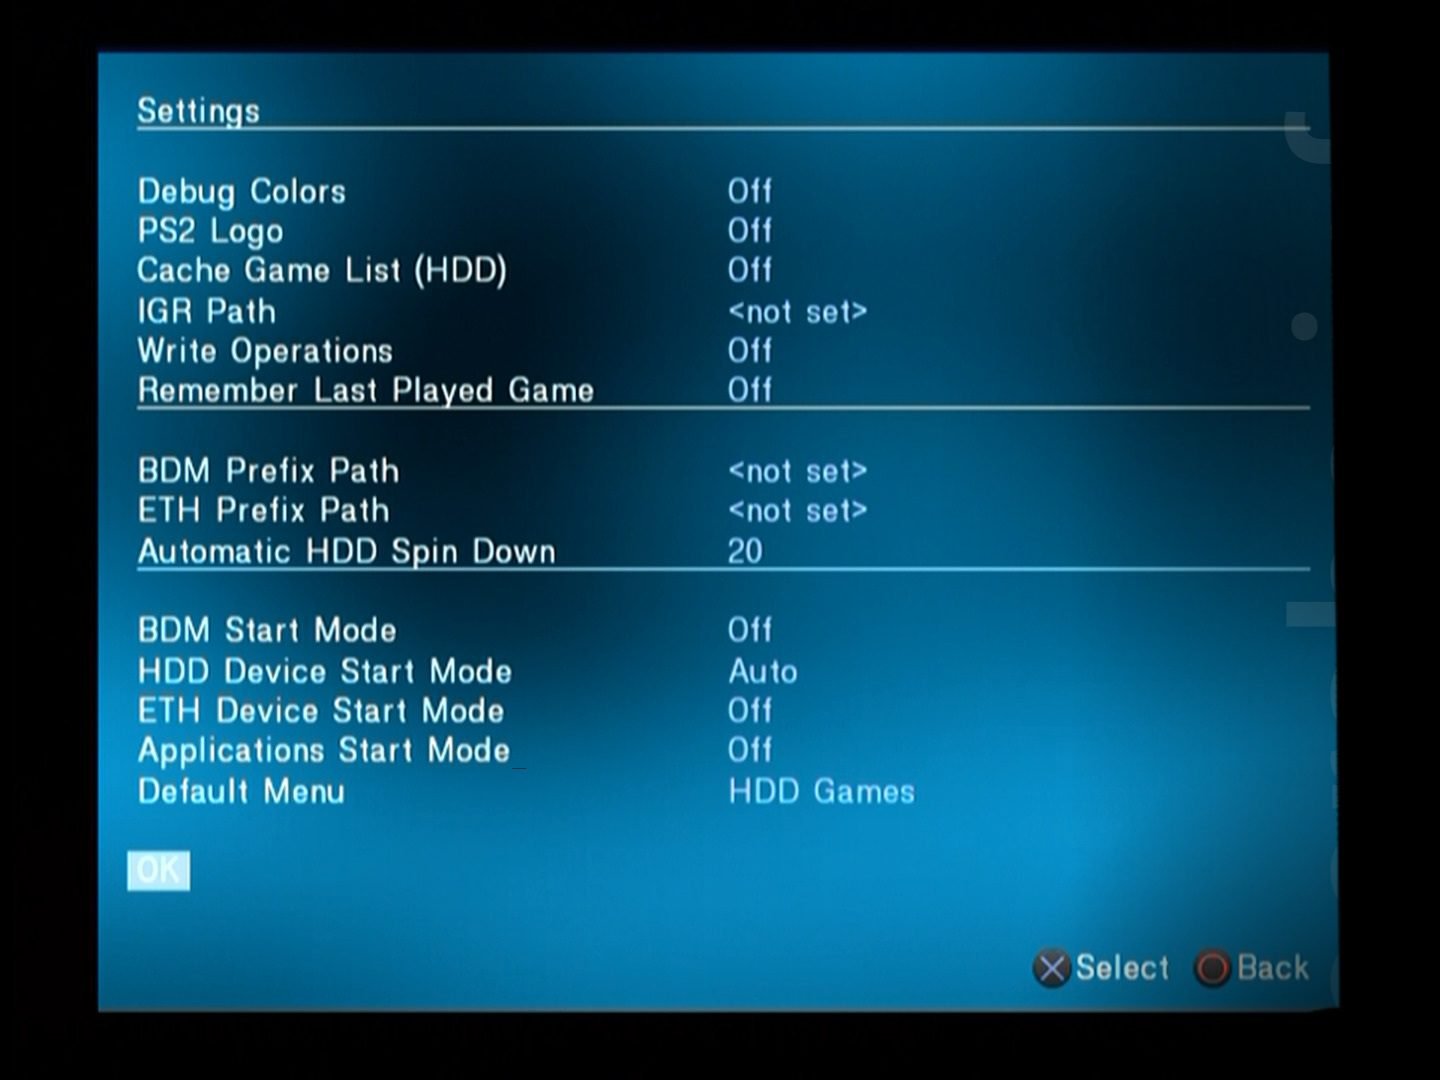
- Choose Settings and then adjust as follows:
- BDM Start Mode: If your PS2 games are on a USB drive, select Auto; otherwise, select Off.
- HDD Device Start Mode: If your PS2 games are on the console’s internal hard drive, select Auto; otherwise, select Off.
- ETH Device Start Mode: If your PS2 games are in a network shared folder, select Auto. Otherwise, turn it Off.
- Default Menu: Select the menu that will appear when OPL starts. Choose the one that contains your PS2 games (for example, HDD Games if your games are on the internal hard drive).
- Return to the menu and select Save Changes to save your changes.
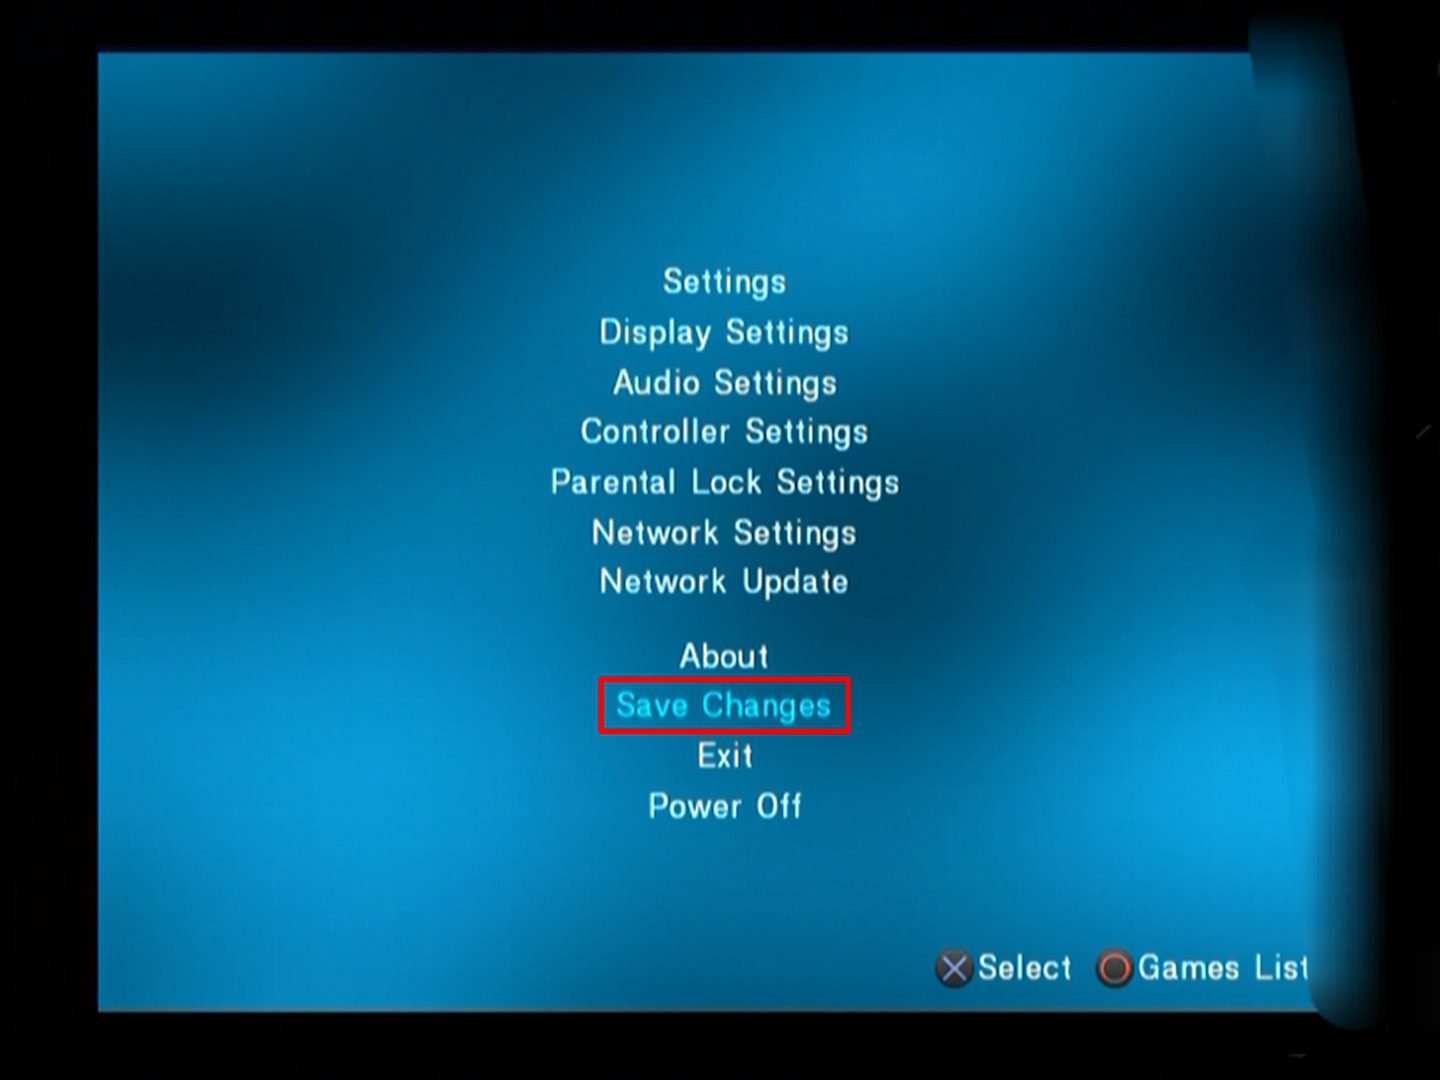
Step 2 Completed: You have successfully configured Open PS2 Loader.
How to Play a PlayStation 2 game with OPL.
To read a PS2 game in ISO format (USB drive or network shared folder) or HDLoader format (internal hard drive) with Open PS2 Loader, follow these steps:
- Launch the Open PS2 Loader.
- Navigate to the page where your PS2 games are stored (internal hard disk, USB key, or network shared folder).
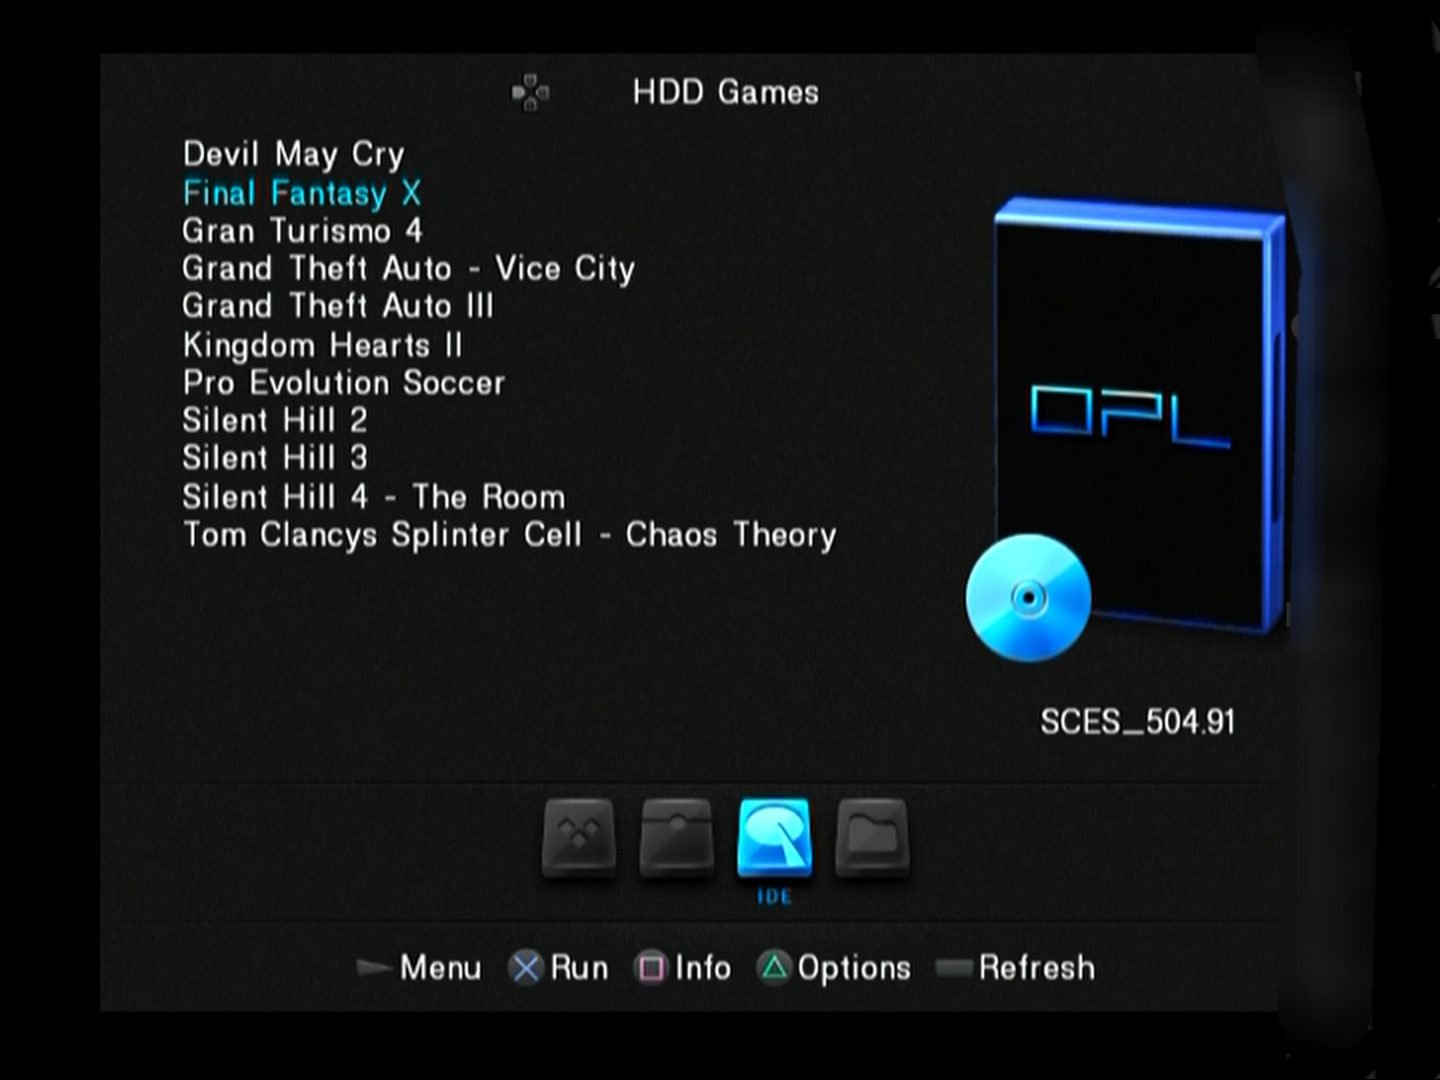
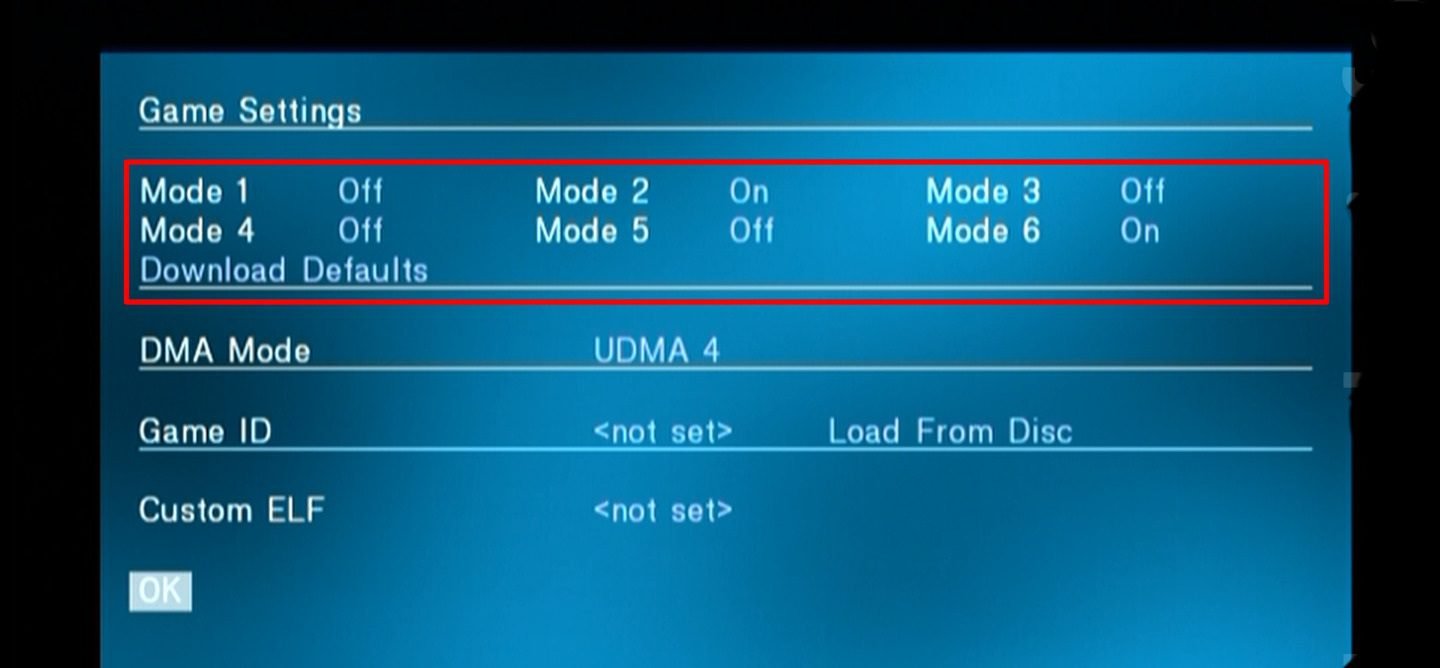
If necessary, press the Triangle button on your controller to open the game menu and select Game Settings to check the required compatibility modes (see here for the modes to select based on the PS2 game). Don’t forget to click the Save Changes button to save your changes. 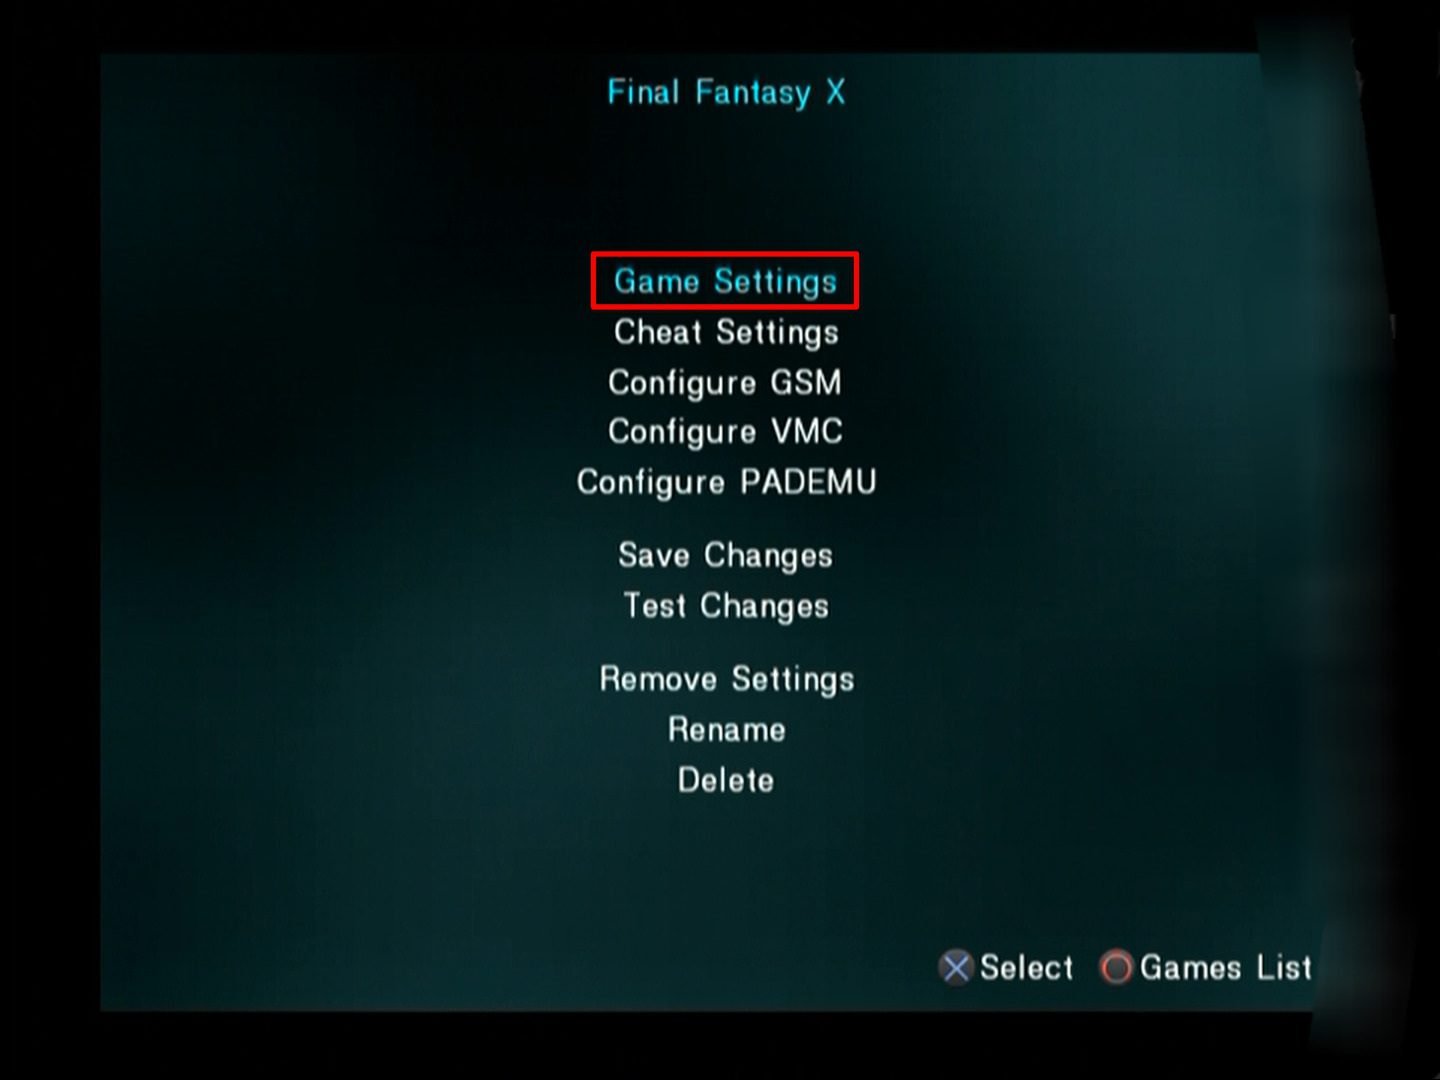
- Select the PS2 game to start it.
- Have fun!
Congratulations: you have successfully launched a PS2 game with Open PS2 Loader! 👍
How to Manage your game collection with OPL Manager
OPL Manager allows you to keep track of your game library.
You may use the crucial OPL Manager program to manage your PS2 game library!
After defining the location of your PS2 games (USB key, network shared folder, or internal hard drive), you can apply Cover Arts and configure Cheat Codes, Virtual Memory Cards, and the compatibility modes of each PS2 game.
OPL Manager Installation and Configuration.
To install and configure OPL Manager, follow these steps:
- Get OPL Manager and unzip the ZIP archive on your computer.
- Run OPL_Manager.exe (as administrator if your games are installed on a hard drive).
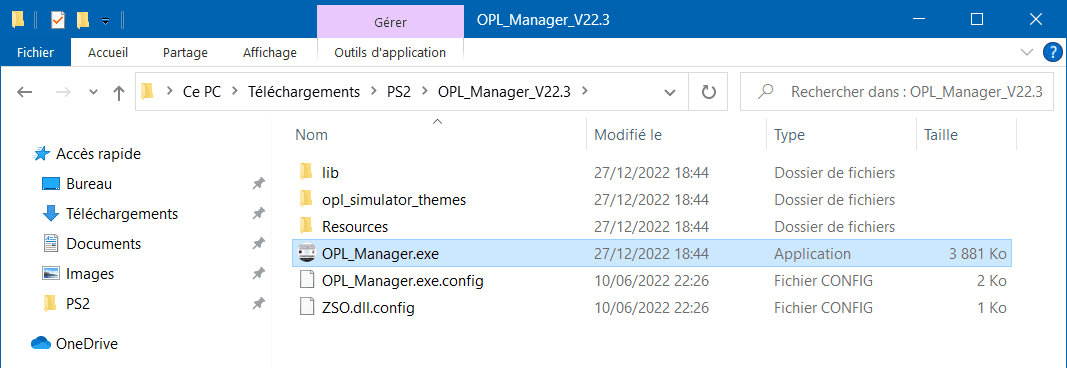
- Select the language and enable the automatic update search upon startup.
- Depending on your configuration, select the following mode:
- If you have your games on a USB device or a shared folder: Normal.
→ In Path, Select the path to the USB drive or shared folder.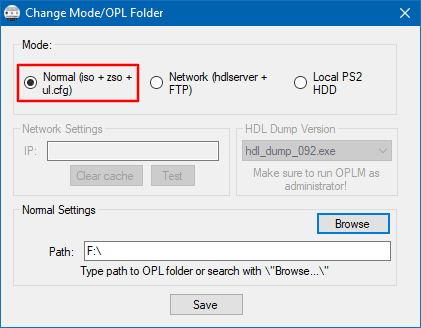
- If your games are on the internal hard drive and you’re using the Sony network adapter to connect to the PS2: Local PS2 HDD.
→On the PlayStation 2, launch Open PS2 Loader. →Start the NBD Server.→On the PC, Open HDL Batch Installer and Enter the PS2’s IP address→Connect →Search PS2 HDD.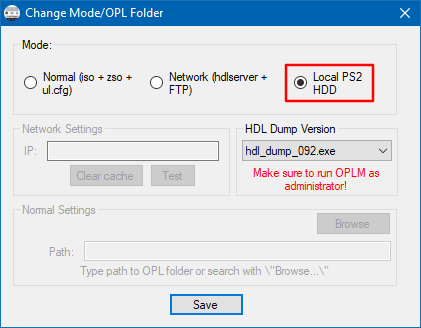
- If your games are stored on an internal hard disk that is connected to your computer through an IDE/SATA to USB adapter: Local PS2 HDD.

- If you have your games on a USB device or a shared folder: Normal.
- Select Save.
- If the notification “X invalid files” appears in OPL Manager. The “showing invalid files tab” indicates that some ISOs have been misnamed, which may hinder OPL from correctly reading them. If you are in this situation.
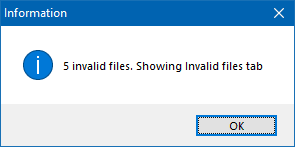
- In the Invalid files tab , click Convert between both ISO files name formats.
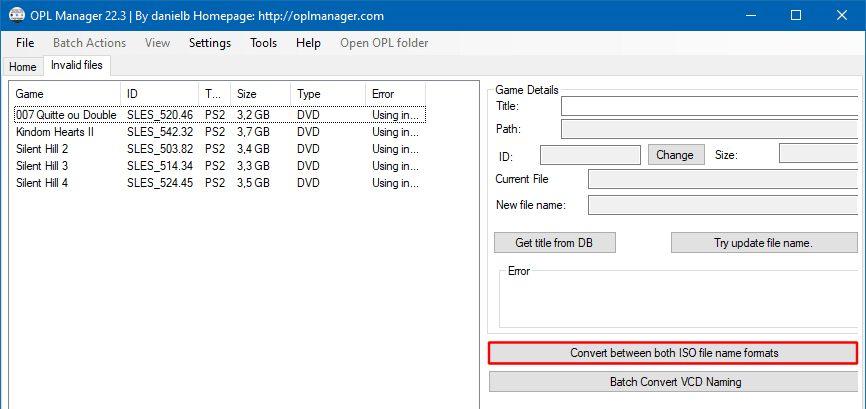
- Click Select All →Convert to OLD format.
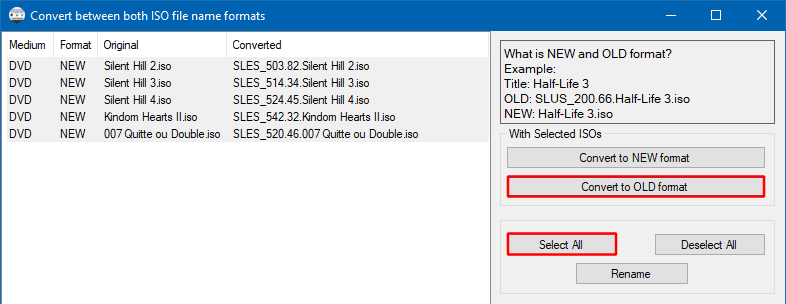
- Finally, select Rename.
- In the Invalid files tab , click Convert between both ISO files name formats.
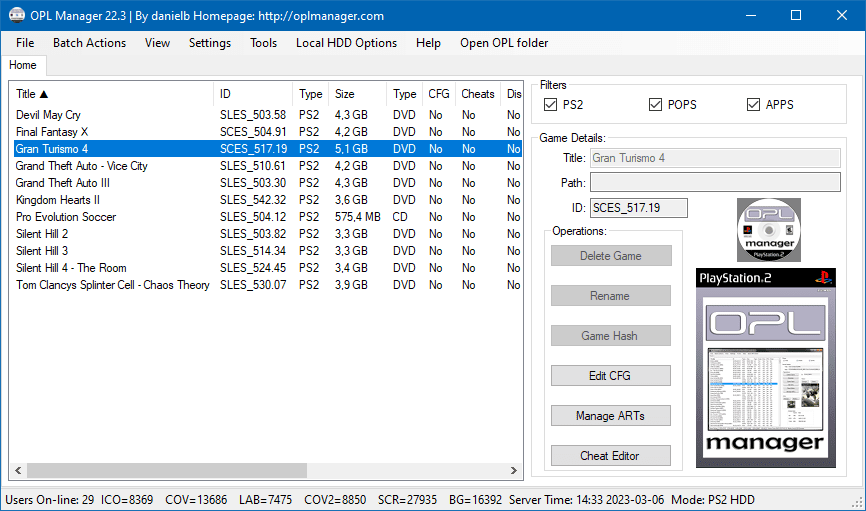
- Congratulations, you can now arrange your PS2 game collection, as well as PS1 games (POPS) and applications (ELF)!
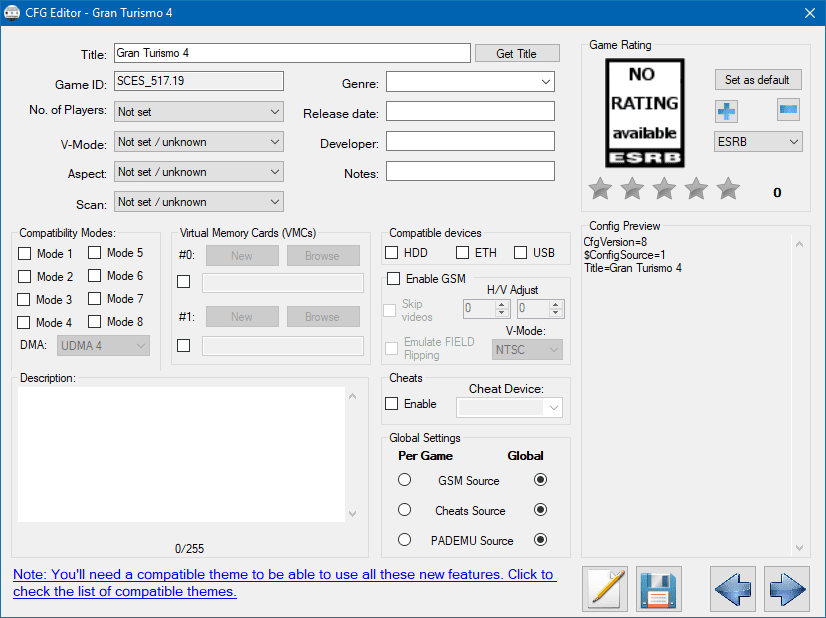
- Click on Edit CFG to configure a PS2 game.
- If you’re in Local PS2 HDD mode, once you’ve completed, follow these steps to save your modifications (game configuration, virtual memory cards, cheats, and so on) to the internal hard drive.
How to Add Cover Art (Jacket, Disc)
To add Cover Arts (cover, disc) to your PS2 games, follow these steps:
- Go to Batch Actions > ART Download and install Cover Arts for all of your PS2 games.
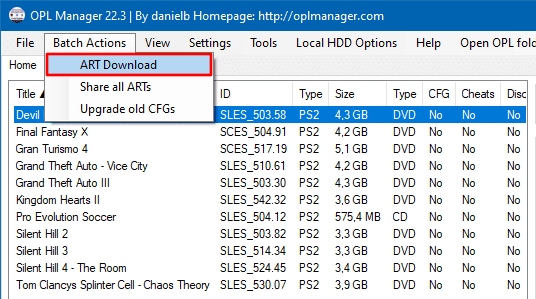
- Press the Start button.
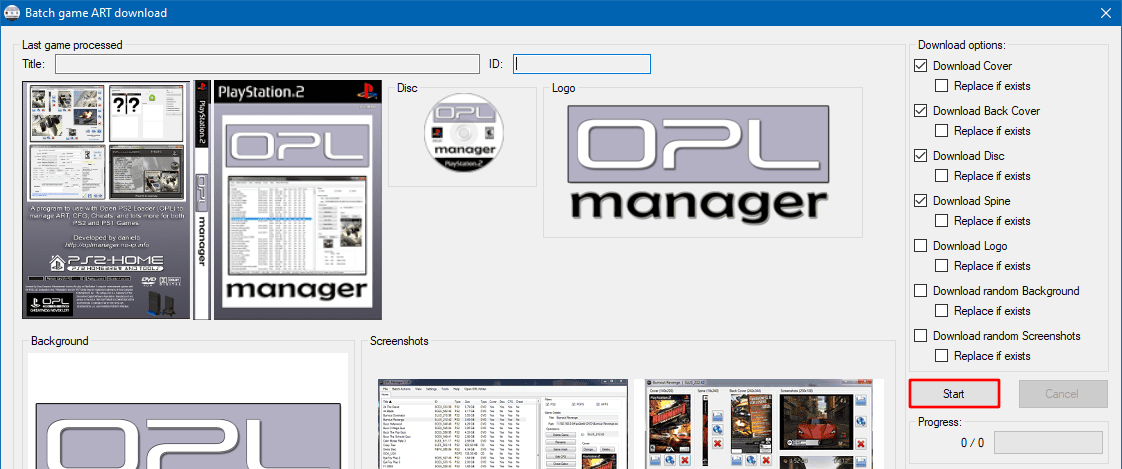
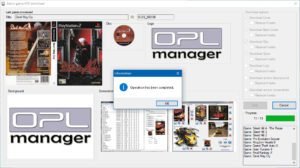
- That’s all there is to it; the cover arts have been uploaded! You should notice it in the Cover and Disc column. Select Yes.
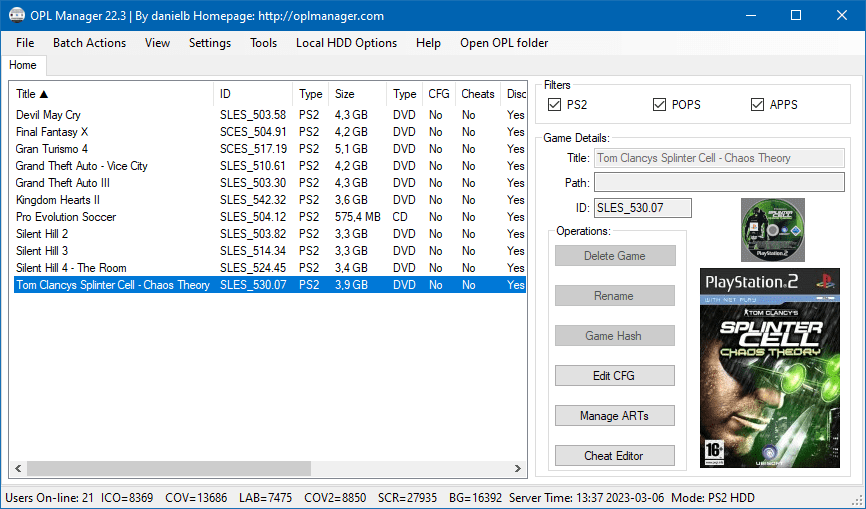
- Depending on the mode selected:
- if you are in Normal (iso) mode, the Cover Arts have been copied to the ART folder of the USB key or shared folder
- if you are in Local PS2 HDD mode, follow these instructions to copy Cover Arts to the internal hard drive.
- On your PlayStation 2, navigate to Open PS2 Loader→Display Settings→Cover Art→On.
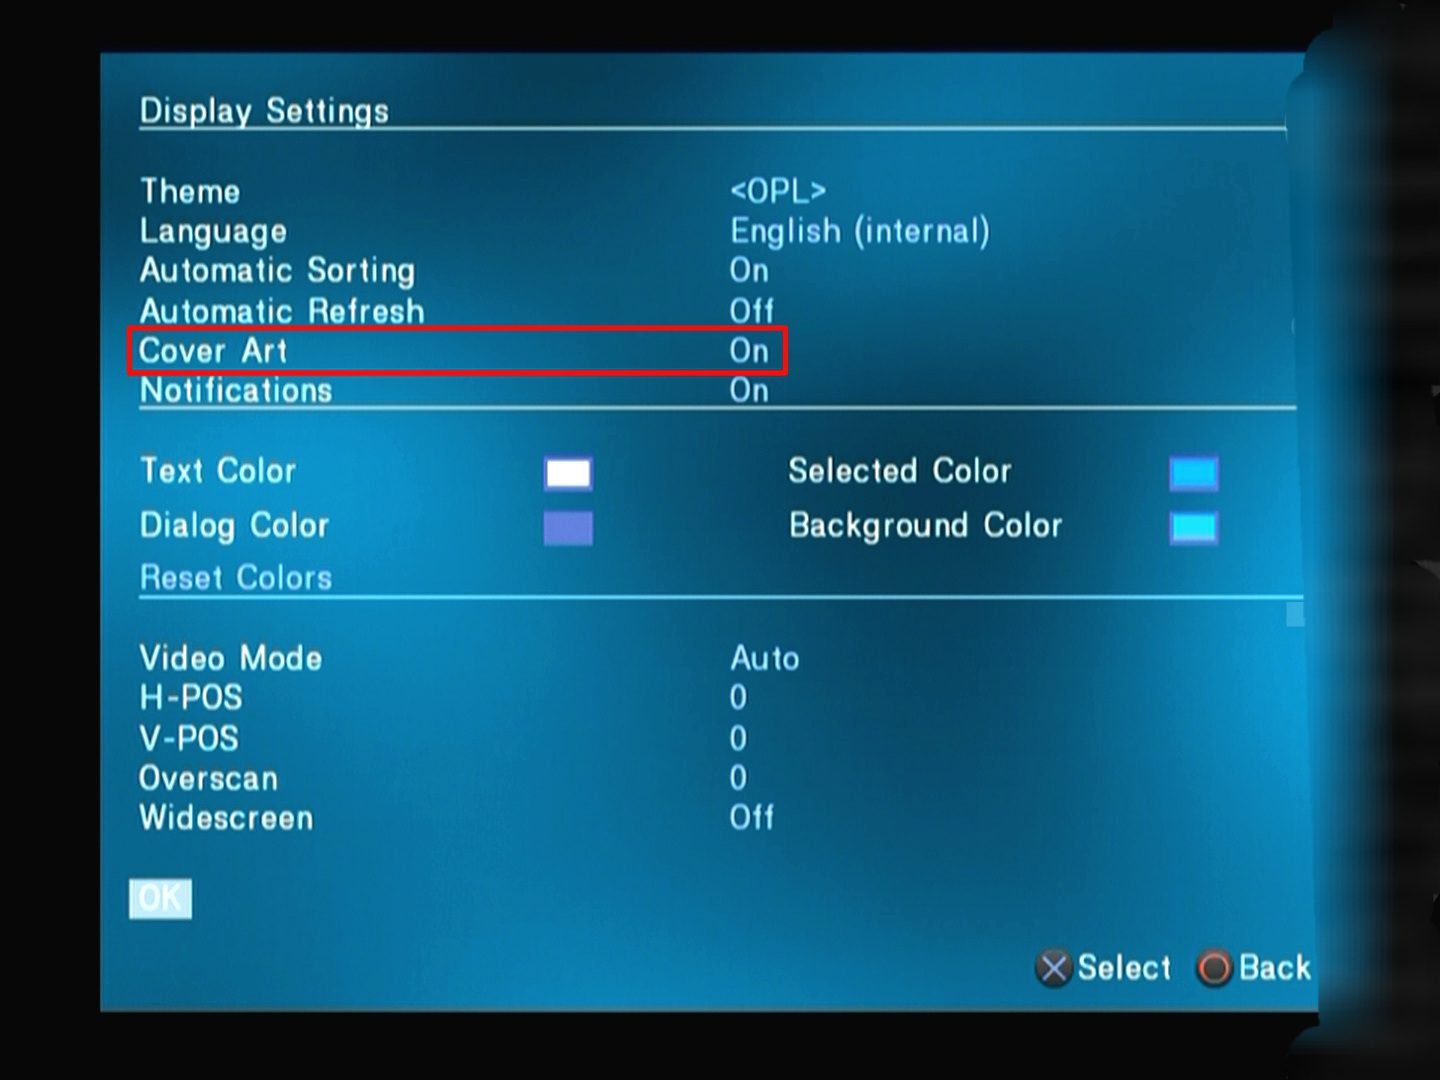
- Return to the menu and Select Save Changes to save your changes.

- Go to the Games List by pressing ○: the Cover Arts of your PS2 games are displayed.
How to Copy Resources to the Internal Hard Drive
If you are in Local PS2 HDD mode, you must take the following steps to copy the resources (game configuration, covers, etc.) to the internal hard drive:
- In HDL Batch Installer, mount the +OPL partition of the PS2 hard disk by selecting HDD Management→Mount HDD Partition→Mount.
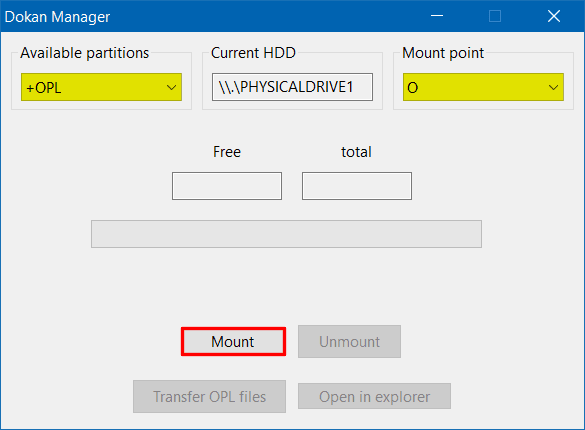
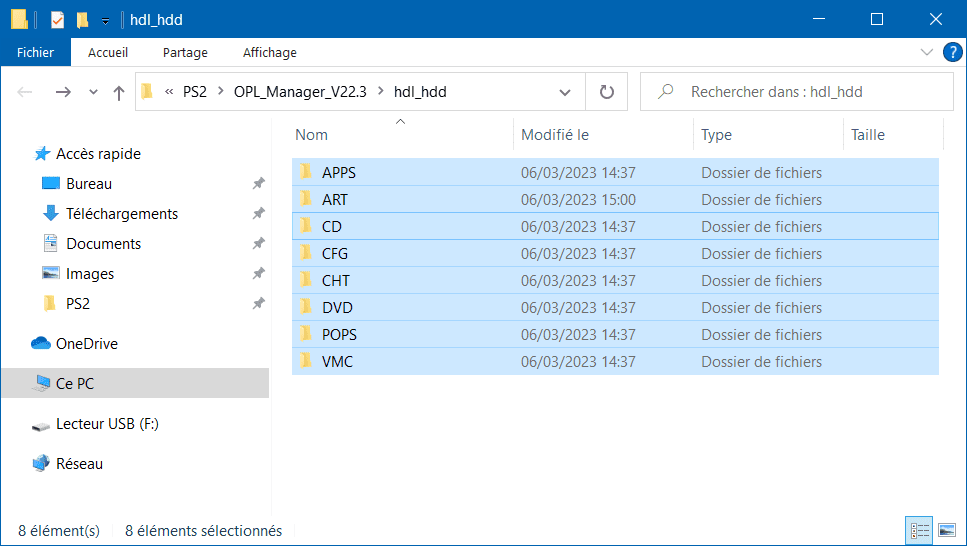
- In OPL Manager, select Open OPL folder from the menu.

- Copy the full contents of the hdl_hdd directory.
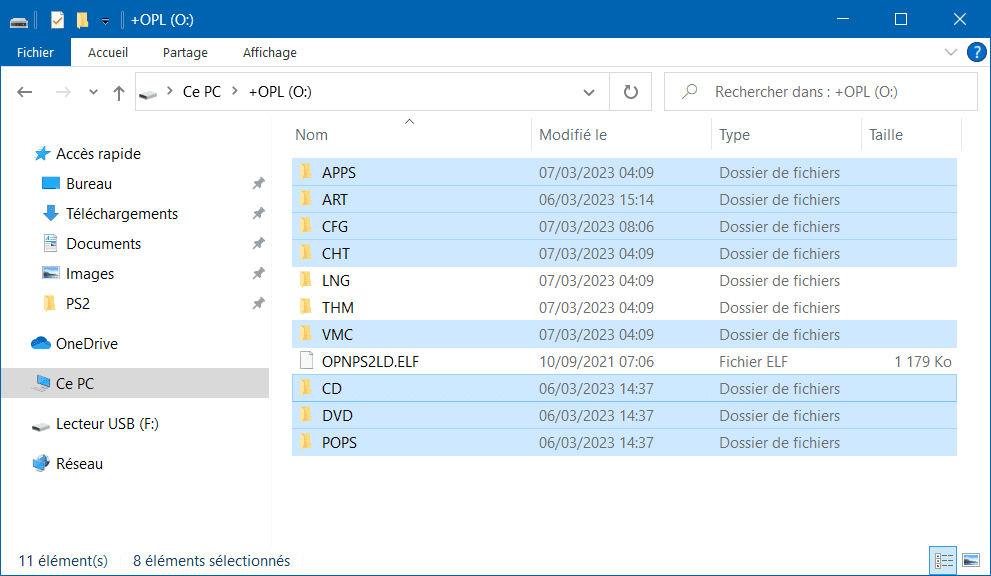
- In this PC, access the mounted +OPL partition and paste the contents copied earlier.
- Unmount the +OPL partition.

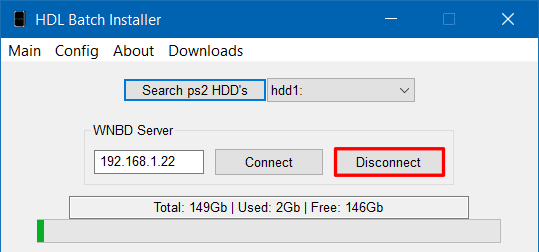
- If you are using the NBD connection to access the hard drive, disconnect by clicking Disconnect when finished.
Congratulations: you now know how to manage your PS2 game collection with OPL Manager! 👍

