Table of Contents
Do you want to know how to migrate OS to SSD in Windows 11, 10, 8, and 7? AOMEI Partition Assistant Professional is a powerful tool that can clone Windows to SSD without losing data.
Why migrate OS to SSD in Windows?
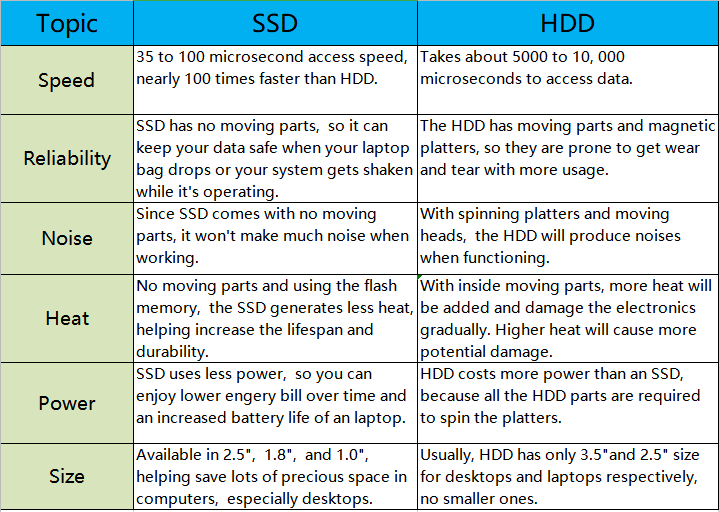
As we all know, compared with traditional HDD, SSD has advantages in speed, reliability, noise, power, heat, size, etc. For better performance, many Windows users are looking forward to move Windows 10 to SSD.
However, Windows doesn’t have any built-in disk cloning software. Therefore, to complete the system migration in Windows 11, 10, 8, and 7, third-party software is required.
Check out more:
How to Reinstall Windows 10 without Losing Data with AOMEI Backupper Standard software
The best software to clone Windows to SSD in Windows 11, 10, 8, 7
There are numerous disk cloning software windows 10 available in the market to migrate Windows OS to SSD, but among these software, I highly recommend AOMEI Partition Assistant Professional. Not just because it’s powerful, but because it really does help me a lot. I’ll list its highlights for you:
- Compatibility: Support Windows 11, 10, 8, 7, Vista and XP.
- User-friendly: With a concise and friendly interface and step-by-step wizard, even a novice can use it easily. In addition, the user can preview the operation result. If not satisfied, cancel the operation.
- Hot Clone Tech: Allows users to migrate hard drives while in use, without rebooting the computer into Windows PE mode or PreOS mode after migration, making the whole process more convenient.
- Two migration methods: Migrate OS to SSD only supports moving the system and its related data to SSD/HDD; Disk Clone Wizard supports cloning the entire hard disk, including personal data, to SSD/HDD.
Apart from that, AOMEI Partition Assistant Professional has many more useful features, such as, SSD 4K alignment, SSD secure erase, convert MBR to GPT windows 10, etc.
Step by step: Migrate OS to SSD on Windows without losing data using AOMEI Partition Assistant Professional
Now, I will show you how to migrate OS to SSD in Windows with AOMEI Partition Assistant Professional step by step.
Step 1. Preparation jobs
- If your computer is a desktop, put the SSD into the main computer, you may need a screwdriver. If it is a laptop, please prepare a SATA to USB adapter to connect the SSD to the laptop.
- If the SSD is brand new, initialize the SSD in Disk Management. Otherwise, it is not recognized by Windows.
- The partition style of SSD must be the same as the source disk. To avoid changing the boot mode after system migration, please convert MBR to GPT or GPT to MBR if necessary.
- Don’t ignore power issues, because once the computer loses power, the entire migration process will be forcibly terminated.
Step 2. How to migrate OS to SSD in Windows
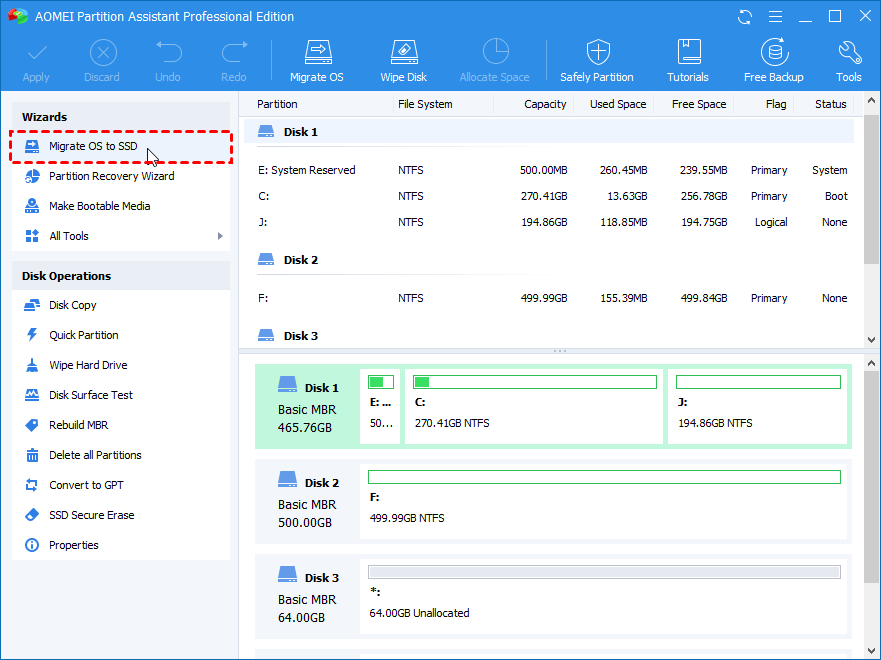
- Install and open AOMEI Partition Assistant Professional. Click “Migrate OS to SSD” under “Wizard”.
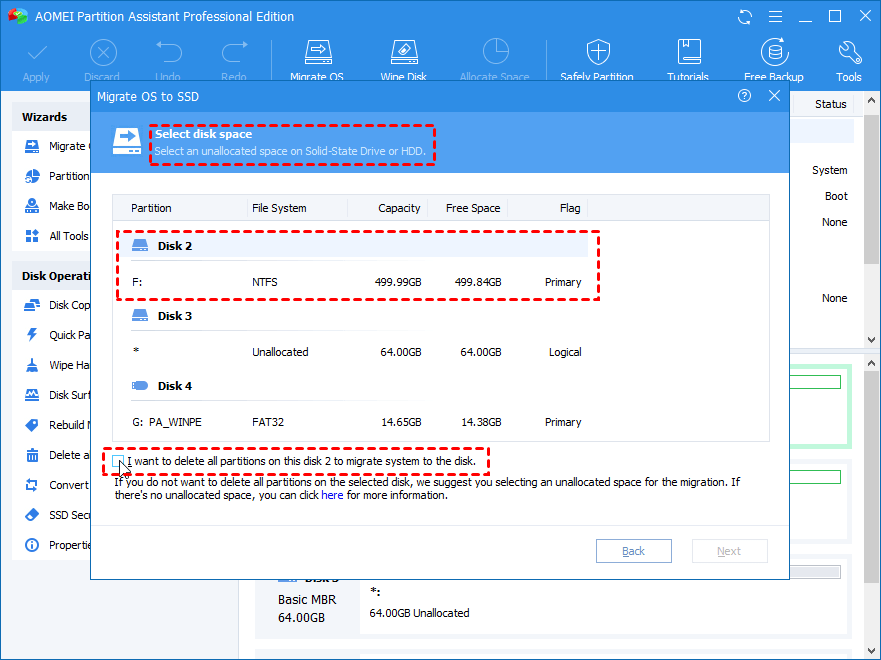
- Select an unallocated space on the target SSD and click Next.
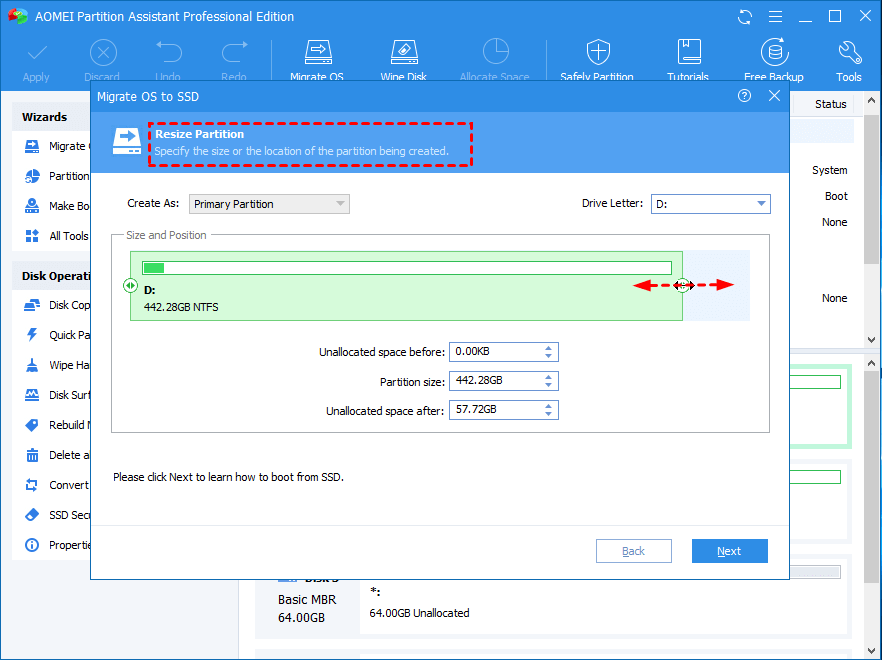
- Change the size of the system partition in the pop-up window.
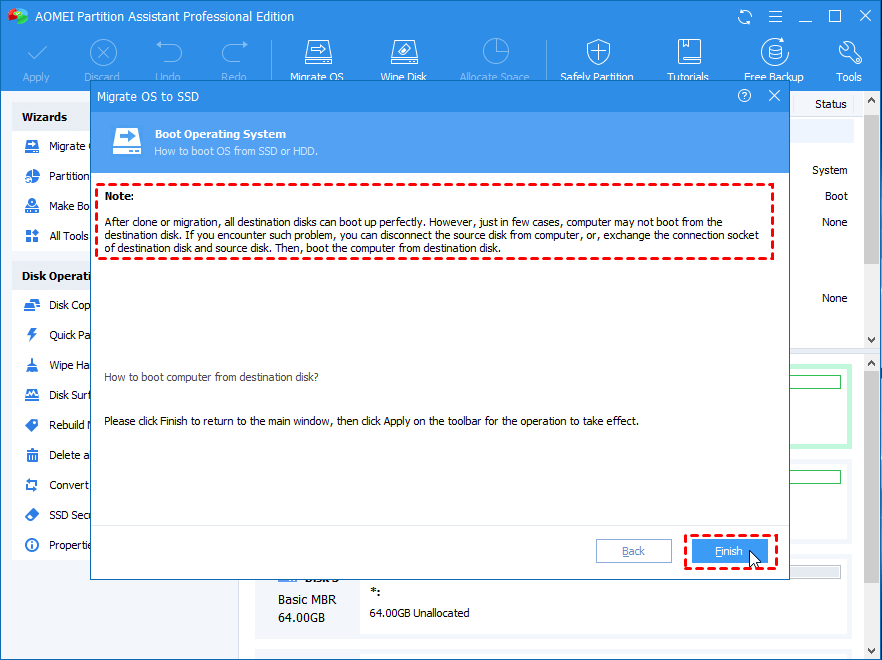
- Read the “Note” which will teach you to boot the operating system after migration.
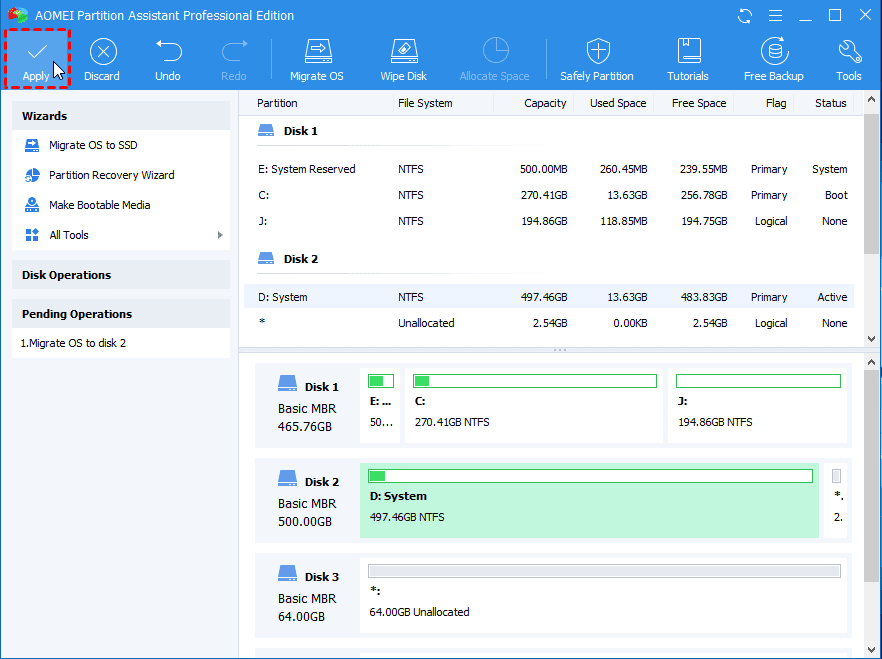
- Click “Apply” and “Proceed” to confirm this action.
Step 3. Boot from SSD successfully
Did you think it was over after migrating Windows to SSD? No, you’re almost done, you should boot Windows from the SSD. How to boot it? You can refer to the steps below:
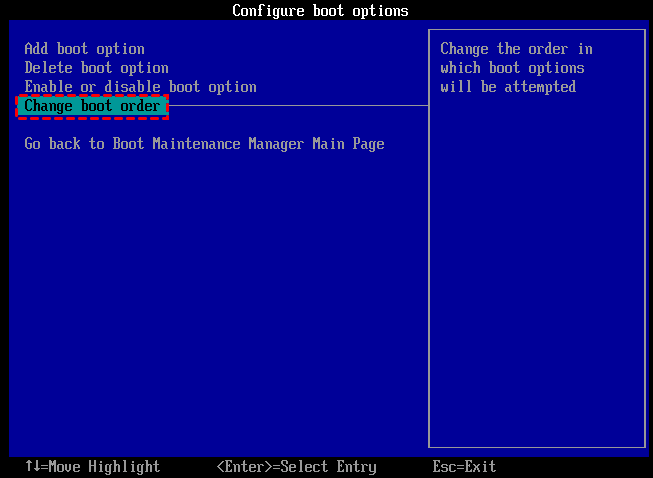
- Restart the computer, when the screen is light up, repeatedly press F1/F2/F3/F5/F11/F12/Esc to enter the BIOS setting.
- Choose the “Change boot order” option to set the SSD as the boot drive.
- Restart the computer after saving and exiting.
Bottom line
This is the full guide of migrating OS to SSD in Windows 11, 10, 8, and 7. With the help of AOMEI Partition Assistant Professional, you can easily move the Windows system to HDD or SSD without reinstalling. After Windows has booted from the SSD successfully, you can also wipe the HDD to use it as a data disk.
