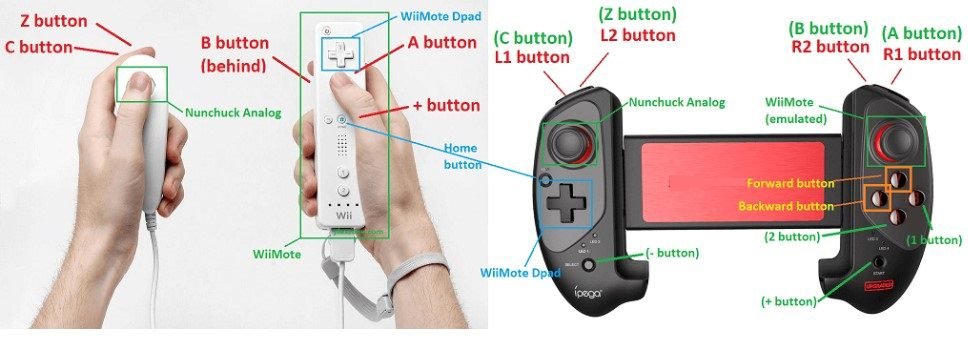
This article will show you how you can map and configure your Bluetooth gamepad controller, both left and right to work with Dolphin – the best Nintendo Wii emulator on Android and PC(windows). By following the guide in this article you don’t need to have the original Wiimote, Nunchuck, Wii MotionPlus, or sensor bar anymore. Your Dolphin emulator can now play Nintendo Wii games that require MotionPlus.
Check out:
how to configure Bluetooth controller gamepad on Dolphin emulator
Pre-requisites (what is needed for your controller to work)
- Latest Dolphin emulator apk or exe file. You can visit the official website to download the latest version both for Android and Windows computer here https://dolphin-emu.org/download
- Ensure you have your Wii game ISO, disc or ROM downloaded to your smartphone or your PC
- A Bluetooth gamepad controller with R1, R2, L1, and L2 trigger buttons for easy setup and gameplay. e.g Xbox one controller, Xbox 360 pad, original Gamecube controller, PlayStation 3 or 4 controller, Bluetooth gamepad, onscreen virtual gamepad.
How to Configure Dolphin emulator to play Wii games that require MotionPlus, WiiMote, and Nunchuck for Android smartphones and windows pc
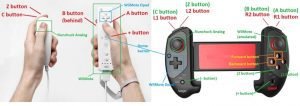
Following the below steps, you can map both Nunchuck and Wiimote into a single controller. The Wiimote movement shall be emulated with the right analog stick.
dolpin-controller-settings-configuration-5
1. Open your Dolphin emulator on your Android or PC
2. Go to the controller section in the emulator and under Wii Remotes, click on “Emulate the Wii’s Bluetooth adapter” then on Wii Remote 1, choose “Emulated Wii Remote”. Click Configure.
3. You have to setup your controller and map the Bluetooth Xbox controller gamepad buttons with the emulator.
- Under device select your desired gamepad controller
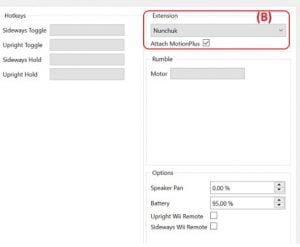
- Under extension select, Nunchuck and tick Attach MotionPlus because many games like legends of Zelda and super Mario will require it.
dolpin-controller-settings-configuration-1
- Under the buttons, section selects the required corresponding buttons on your Bluetooth controller you can Set the WiiMote A, B, 1, 2, +, and – buttons.
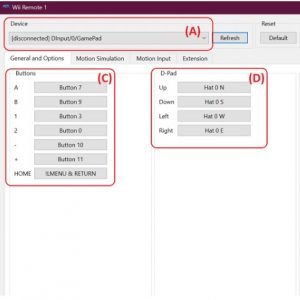
dolpin-controller-settings-configuration-2
- You can now proceed to set up the Wiimote DPad button accordingly
4. Goto the Extension tab section and set up the stick section for the Wii Nunchuck settings. Set the Nunchuck analog stick as well as the C and Z buttons.

5. Go to the Motion Simulation tab. This is where the Wiimote motion and MotionPlus are emulated, set up, and configured. You can simulate this using the left analog stick on the controller (The same analog used for the Nunchuck analog stick).
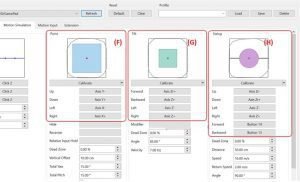
dolpin-controller-settings-configuration-4
6. The tilt section is to set up the Wiimote tilting capability. Simulate this using the right analog stick on the controller. Things to note here, the setup has to be inverted. When you tilt forward, it’s like when you push the right analog stick down. When you tilt backward, it’s like when you push the right analog stick up. Left tilt to be mapped to right analog stick left and so does right tilt to be mapped to right analog stick right.
7. The swing section is to set up the Wiimote swinging capability. When you swing up, it’s like when you push the right analog stick up. So this doesn’t need to be inverted. When you swing down, it’s like when you push the right analog stick down. Left-wing and right swing are both like when you push them to the left and right.
8. Save the configuration you have just done by clicking on the Save button.

